|
|
Leading Distributor of
Copper Nails & Fasteners
________________________________________________
Instructions - Riveting |
 |
 |
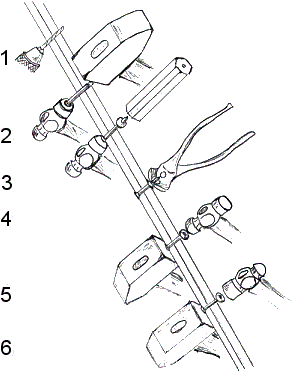
| 1. Bore a pilot hole one drill bit size
smaller than the thickness measured across the flat faces of the nail shank.
The nail length should be at least the combined wood thickness plus 3/8". |
| 2. Hammer the nail into the planks until
the point emerges enough to position the rove on the nail tip, about ¼"
(concave side of the rove faces the plank). Use the bucking hammer on the
inner piece to absorb the shock of driving the nail. |
| 3. While firmly holding the rove set on
the rove, continue driving the nail until the rove comes into contact with
the inner plank. Be careful not to drive the nail as to set the head below
the plank's surface. If a helper is bucking the nail head you can drive the
rove down by hammering on the rove set. In this situation the nail is driven
all the way first. |
| 4. Clip off the excess nail
with the nippers positioned tight to the rove. This will leave just the proper
length of nail above the rove for riveting. |
| 5. With the bucking hammer in contact
with the nail head, first strike the rove three light taps around edges of
the clipped nail end with the ball end of a 3-4 oz ball peen hammer. This
chases the rove a bit tighter down the shank. Don't forget your hearing
protection! |
| 6. Finally peen over the nail end with
light blows forming it tight to the rove, about five to eight blows. Make
sure the bucking hammer has good positive contact with the nail head (it's
OK if it rebounds a bit with each blow). If you rivet too hard you risk bending
the nail inside the pilot hole. |
|
For more instructions, click on Clenching
Directions. |
________________________________________________
ORDER TOLL FREE (800) 505-8692
© Copyright Faering Design, All Rights Reserved |